The general Posterino workflow looks like this:
Open Posterino
-
Choose a template for your new document
Browse through the list of templates and pick one you like to use for your new document. Click , then pick a document size, resolution and orientation from the drop-down sheet.
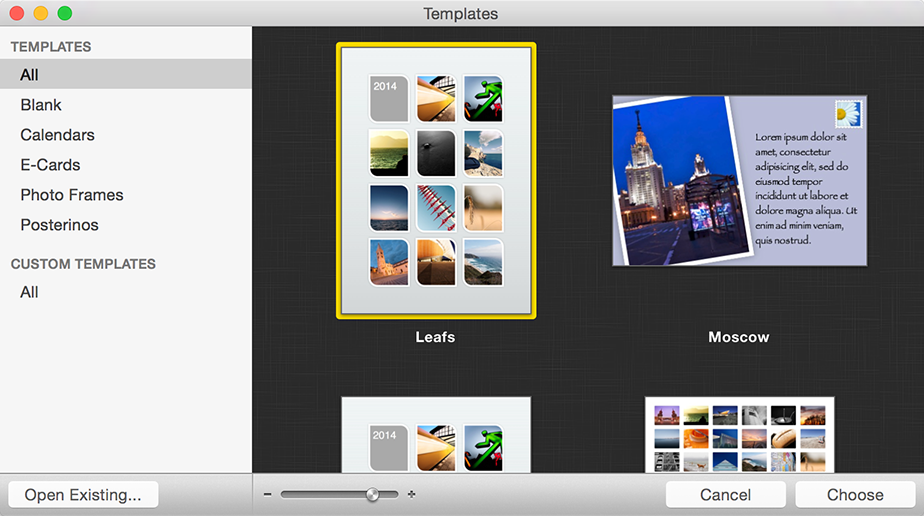 The template chooser.
You may need to choose from the menu to display the template window.
-
Add images to your document
There are various ways to add images to your document:
- Drag & Drop images from the image browser on the left of the window to your document. You can drop the image over an existing image frame to fill the frame or drop it over the document background, to add a new image.
- Or select an album from the image browser and click the toolbar button to populate your document with random images.
- Or use Drag & Drop to move images from your hard disk to your document using the Finder.
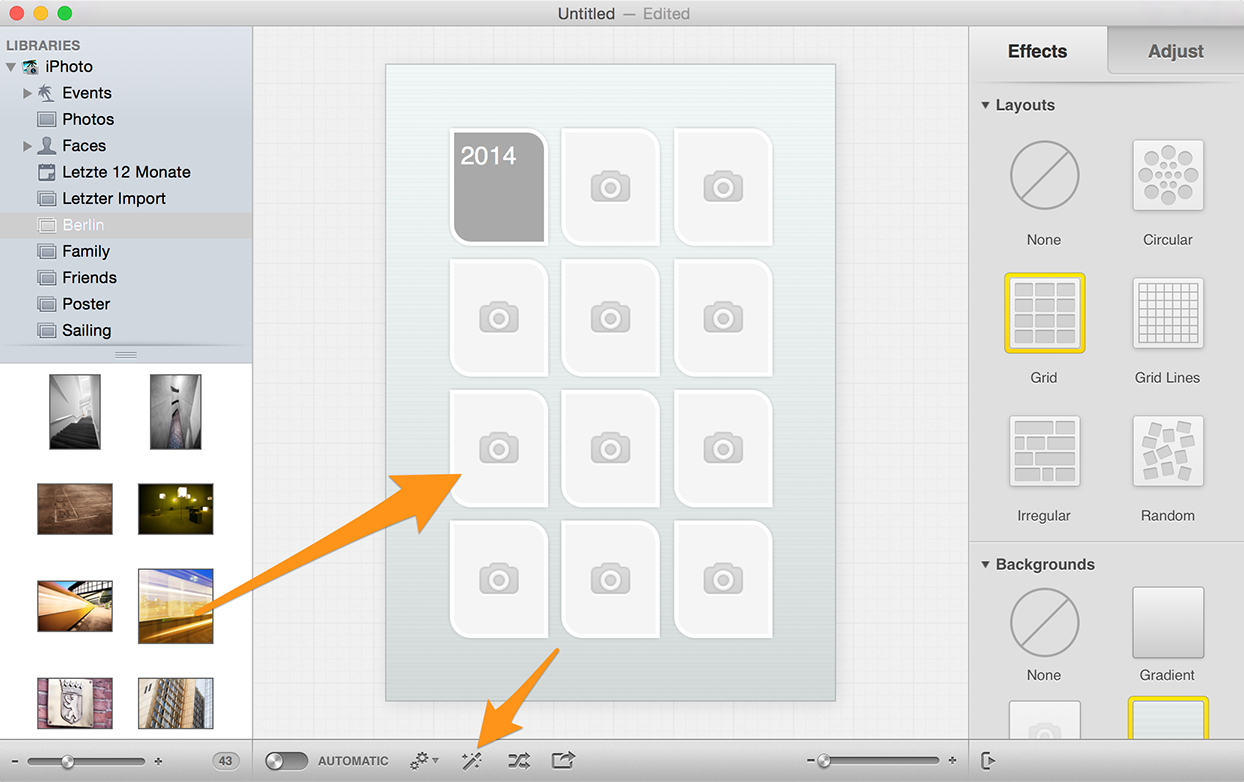 Ways of adding images to a document.
Delete empty image frames as needed or adjust the number of images in your document to your needs.
-
Customize the layout and background of your document (optional)
To customize the layout or background, make sure no image or graphic object is selected ( > or Command-D). Now the and panel will show document and background related options.
- You can change the layout (grid, irregular, random, etc.) of images by choosing one of the layout methods on the panel
- And you can customize the document background (gradient, background image, polka dots, etc.) by choosing a style from the panel
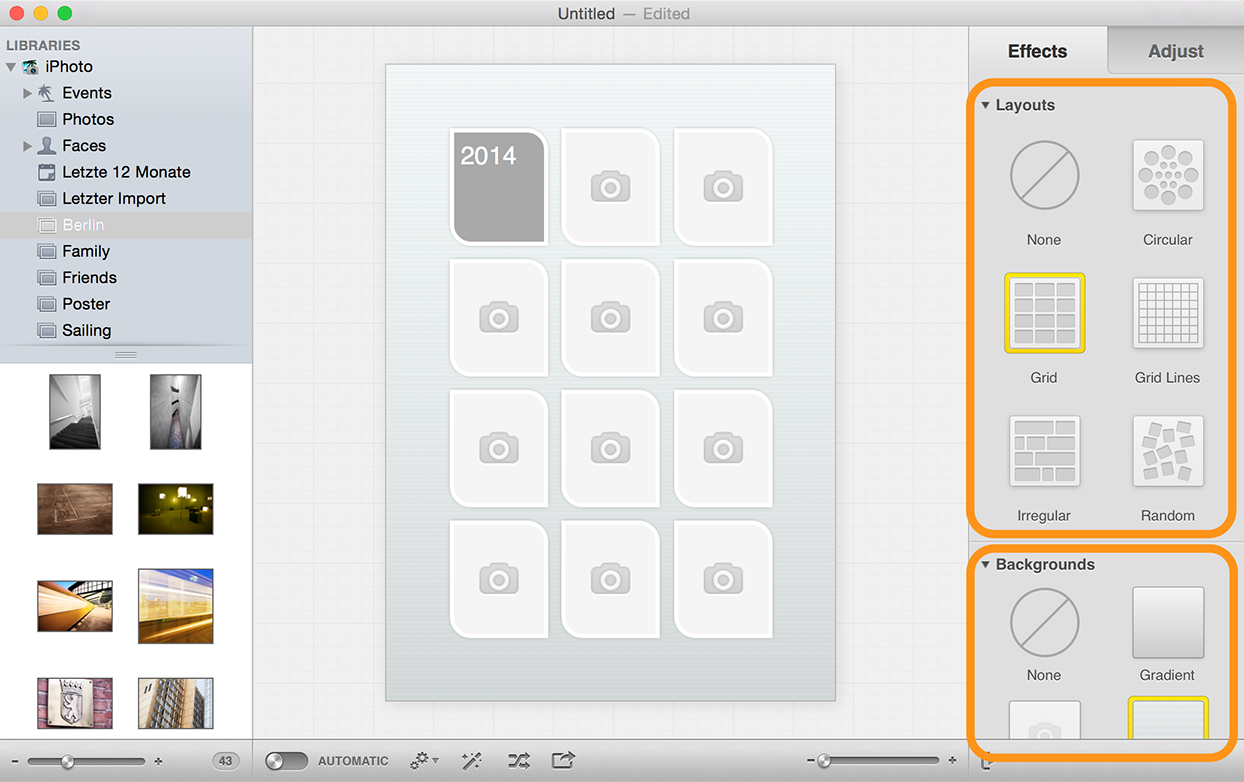 Background adjustments.
 -
Customize the images (optional)
To customize the image or graphic objects, select all objects in question. The and panel will show graphic object related options. Here you can:
- Change the frame of an image
- Set an image filter like Black & White, Sepia, Vintage etc.
- Add decorations like captions or metadata to your images
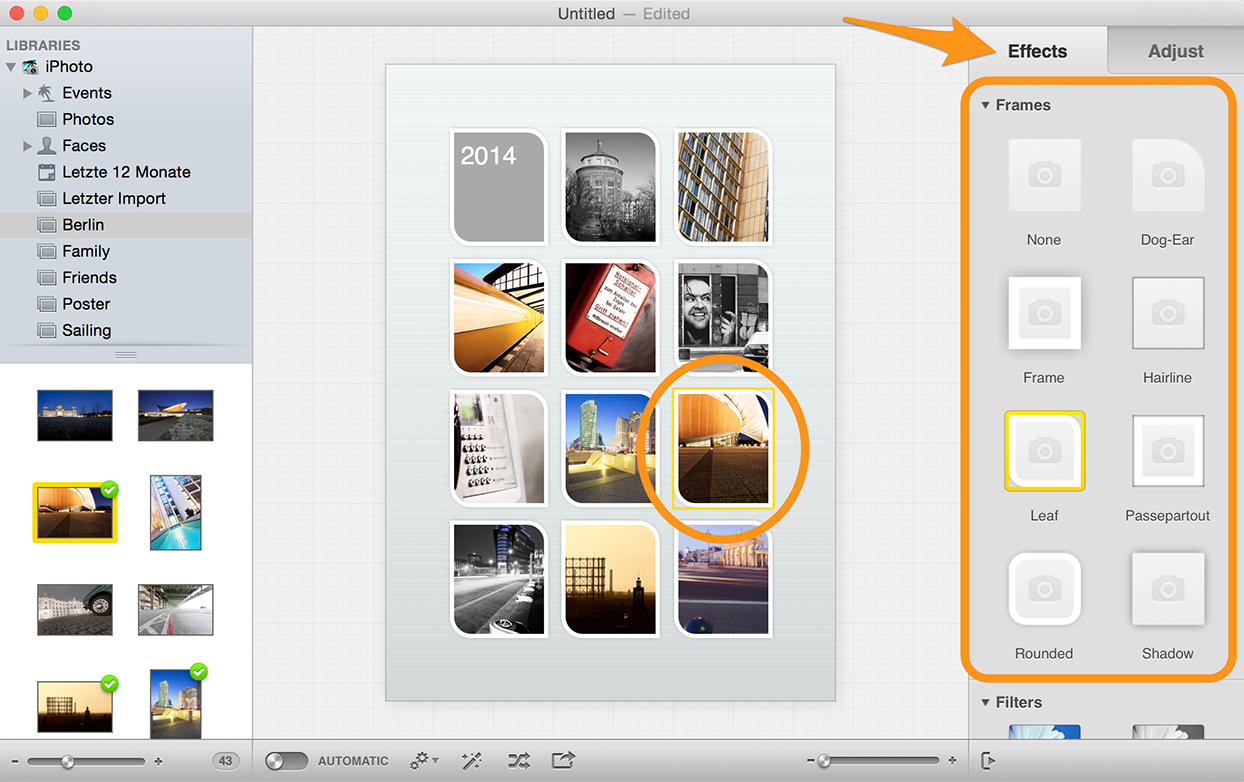 Effects and Adjustments.
 -
Fine-tune your document using the panel (optional)
The adjustment panel will show all available customization properties of the selected graphic object. If no graphic object is selected, the panel will show the options for the document background.
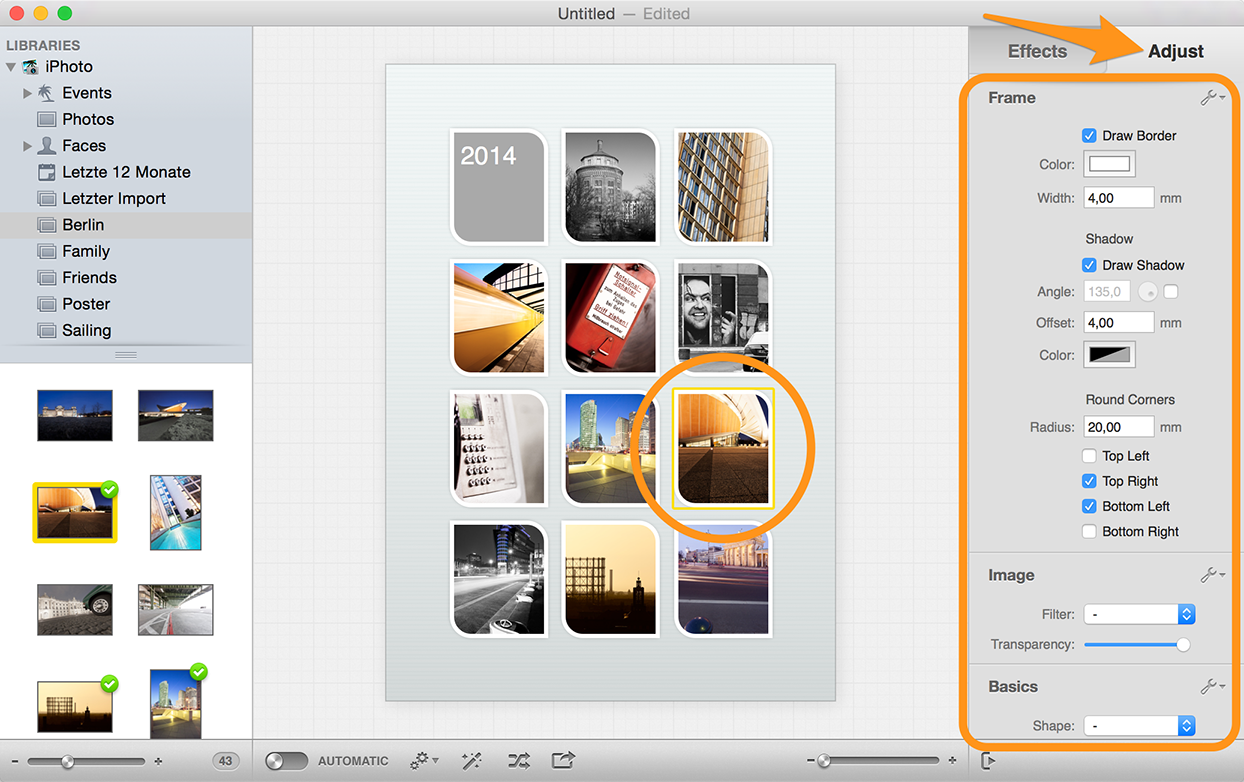 The adjustment panel.
 -
Click the toolbar button and choose a way to export or share your document:
Here you can choose to render your Posterino document into an image file you can send to a print shop or you can share your document on Facebook, Twitter etc.
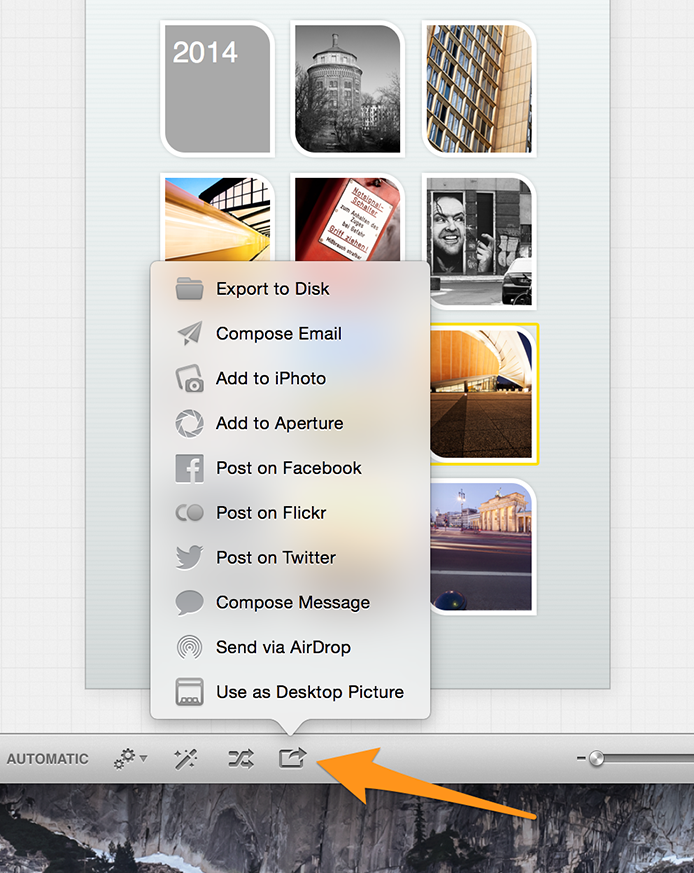 Sharing options.